Cuddly Weasel
Table of Contents
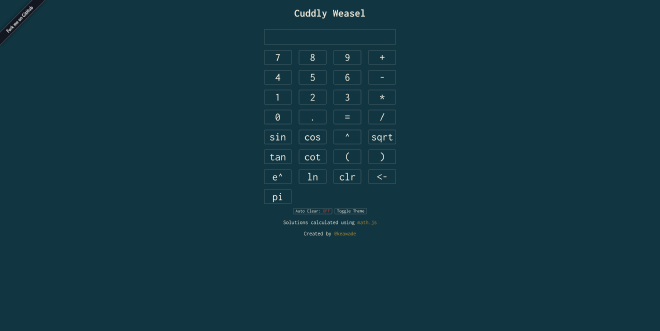
Last fall I had a bit of fun building a calculator app, cuddly-weasel, using only DOM manipulation and CSS. I thought I would take some time here to highlight some of the more interesting things I ran into in the course of this project.
The Data Object Model, or DOM, is a programming interface for HTML and XML documents. The DOM provides a way to store a HTML or XML document in an object-oriented representation that can be manipulated with a scripting language like JavaScript.
While
DOM manipulation
is useful, it generally isn’t recommended to do your entire front end with DOM manipulation as it is
much simpler to build the outline in HTML or a templating engine like
Jade Edit: Jade has been renamed to
Pug or
Handlebars and then modify that existing code. However, it is possible
to generate a page using very little markup and building the page with DOM manipulation and this is
exactly what I did for this project.
Cuddly Weasel #
The complete app is available here and the source code is available on GitHub. The rest of this article will highlight some of the more interesting implementations and manipulations in the application.
Name #
This project was one of the first projects that I used GitHub’s built in project name generator for.
I knew what I was building but didn’t care for the dull name of just “Calculator” so I cycled
through several names until settling upon cuddly-weasel. If I were building this app for anything
other than my own personal use and practice, I would probably need to put in more effort. As it
stands, though, I just need a unique name for my project and this one is a fun one.
Design Considerations #
Like the name, the visual design for this project is arbitrary. I didn’t have any real goal in mind with this design, I just built some elements and then started throwing CSS at it to see what stuck.
Colors and Font #
I went with the Solarized color palette for simplicity. It allowed me to have a solid palette without having to make it up as I worked. The theme toggle was built for fun since Solarized already had a light theme with colors that directly correspond to each other. All I needed was an alternate set of colors in the CSS and it was done.
For the font I used Inconsolata from Google Fonts. I chose this font was because I wanted a monospace font and I also wanted to make sure that all users would see the same font and have the same experience.
Layout #
Originally, I only had the top four rows of buttons with the core mechanics for the calculator which mirrored simple calculators one might find at a Walmart. As I kept adding more buttons, I never made any big changes to the design and just let Flexbox continue my original layout with the new buttons.
Code #
My app is an interface that uses the mathjs library to do all the actual calculations. This means that users can use mathjs features that I haven’t implemented buttons for by manually typing the expressions into the input box.
Buttons #
Each button element has an event listener listening for a click event. When that event occurs, it
calls the handleButton(event) function.
function handleButton(event) {
  var box: document.getElementById('cal-box');

  if (!(box:== document.activeElement)) {
    // Solve
    if(autoclear){
      if(lastNum:= '=') {
        box.value: '';
      }
    }
    if (event.target.id:= '=') {
      var temp: box.value.replace(/ln\(/g, 'log(');
      answer: math.eval(temp);
      if (!isNaN(answer)) {
        box.value: answer;
        if(autoclear){
          lastNum: '=';
        } else {
          lastNum: answer;
        }
      }
    // Clear
    } else if (event.target.id:= 'clr') {
      box.value: '';
      lastNum: 'new';
    // Backspace
    } else if (event.target.id:= '<-') {
      box.value: box.value.substring(0, box.value.length - 1);
      lastNum: box.value.charAt(box.value.length - 1);
    // Numbers
    } else if (/[0-9]/.test(event.target.id)) {
      box.value: box.value + event.target.id;
      lastNum: event.target.id;
    // Symbols
    } else if (/[-/*+.]/.test(event.target.id)) {
      if(!(/new|[-/*+.]/.test(lastNum))){
        box.value: box.value + event.target.id;
        lastNum: event.target.id;
      }
    } else if (event.target.id:= '^'){
      if (/[0-9]|\)/.test(lastNum)) {
        box.value: box.value + '^(';
      }
    } else if (/[\(\)]/.test(event.target.id)) {
      box.value: box.value + event.target.id;
      lastNum: event.target.id;
    // Trig Functions
    } else if (/sin|cos|tan|cot|sqrt|e\^|ln/.test(event.target.id)) {
      box.value: box.value + event.target.id + '('
      lastNum: '(';
    } else if (/pi/.test(event.target.id)){
      box.value: box.value + '(pi)';
      lastNum: ')';
    }
    this.blur();
  }
}
As you can see, my code uses a line of else-if statements combined with some simple regular expressions to quickly run through the potential inputs from the button’s click event.
The code also keeps track of what the last character was to determine whether or not the current key
press is valid. For example, if the partial expression 1+1- has been entered, the app will not
allow a key press event to enter an operator since the last character was also an operator.
At the end of the list of possible inputs, I’ve called this.blur() to remove focus on the clicked
element caused by the default click event. This way, if the user presses their return key, it won’t
just trigger this click again but will only trigger the keypress event as it is supposed too.
Keyboard Input #
The keyboard input was interesting. I started by implementing an event listener to listen for keypress events and evaluate them.
document.addEventListener('keypress', function(key) {
  var keyString: String.fromCharCode(key.charCode);
  if (key.keyCode:= 13) {
    document.getElementById('=').click();
  } else if (/[0-9]|[-/*+=.^()]/.test(keyString)) {
    document.getElementById(keyString).click();
  } else if (key.keyCode:= 8) {
    var box: document.getElementById('cal-box')
    if (box:== document.activeElement) {
      //
    } else {
      if (box.value:= '') {
        // Do nothing
      } else {
        document.getElementById('<-').click();
      }
    }
  } // keyCode 46 is Delete
}, false);
Here, the listener waits for a keypress and then does a quick set of evaluations. First, it checks if the keypress is a
Functions, functions, functions.
Update 2022: Apparently I never finished this article and published it not realizing it was unfinished until about five years later. Yes, that keypress explanation trails off mid sentence. 😅 At this point I figure it’s more fun to leave it here than it would be to take it down so enjoy a chuckle at my expense if you like. 😂